
INBOX ZERO
In this step-by-step overview, learn how to organize your email and get to “Inbox Zero” in Gmail from an ex-Google employee, Michael Mostert. With this system you’ll never miss a follow-up, and you’ll be able to track responses.
EMAIL CATEGORIES
When you look at your inbox, emails generally fall into one of the following three categories. We will start by using Gmail to setup labels to split up inbox emails into these categories.
- Open Gmail.
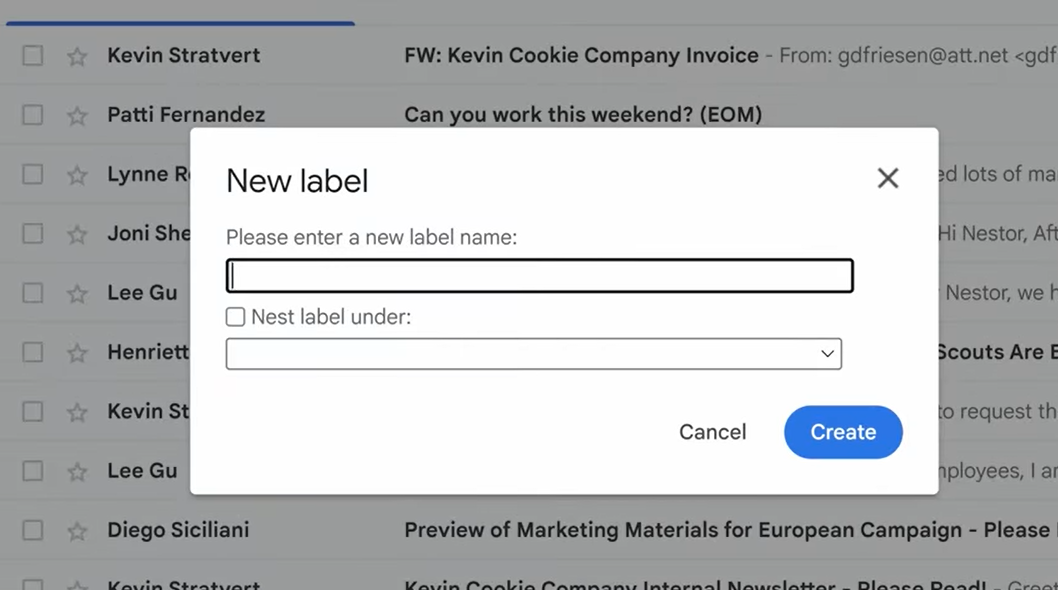
- Click the + button near Labels to create a new Label.

- Enter in the Label name for “[Follow up]”. Click Create.
- Hint: Adding the brackets around the name ensures the label at the top of the Labels list.
- Hint: Adding the brackets around the name ensures the label at the top of the Labels list.
- Click the + button near Labels to create another Label.
- Enter in the Label name for “[Awaiting Response]”. Click Create.
- Click the + button near Labels to create the third Label.
- Enter in the Label name for “[To Read]”. Click Create.
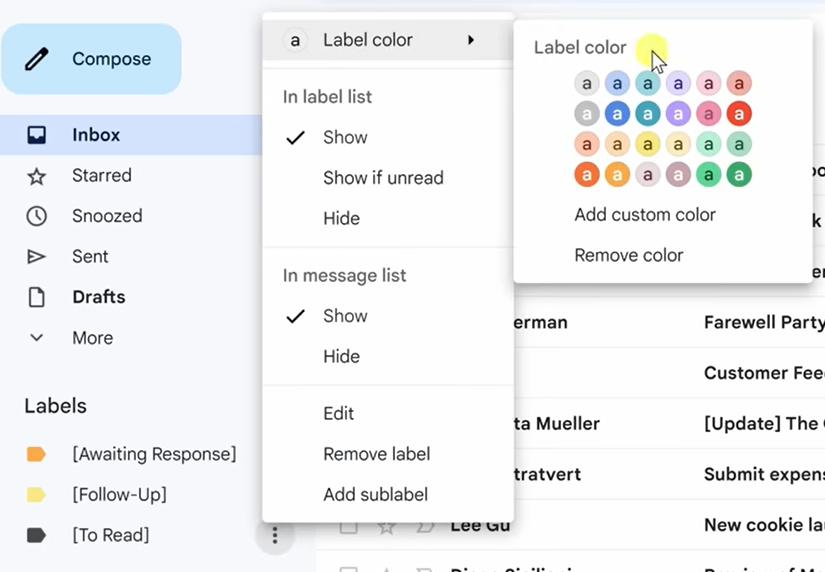
- Now we have the three labels that we can use, we can colorize them which adds a nice touch.
- Move the cursor to the right of the Label, select the … menu and choose the Label color. Do this for each Label.
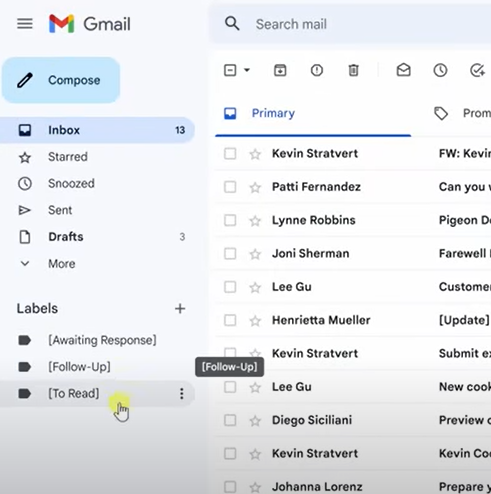
- Suggestion is to use Orange for “[Awaiting Response]”, Yellow for [Follow-Up], and grey for “[To Read]
- Suggestion is to use Orange for “[Awaiting Response]”, Yellow for [Follow-Up], and grey for “[To Read]
ENABLE MULTIPLE MAILBOXES
We can use Gmail’s multiple inboxes to break up the inbox into multiple manageable interfaces.
- Open Gmail.
- Click the Gear icon in the upper right hand corner to open Gmail settings.
- Scroll to the bottom and select “Multiple Inboxes” and choose customize.
- In the first “Section 1” of “Multiple inbox sections:”, paste in “Label:{Awaiting Response]” You must use the exact characters used in the Label name. Set the section name to “Awaiting Response”.
In the second “Section 2” of “Multiple inbox sections:”, paste in “Label:{Follow-Up]” Set the section name to “Follow up”. - In the last “Section 3” of “Multiple inbox sections:”, paste in “Label:{To Read]” Set the section name to “To Read”.
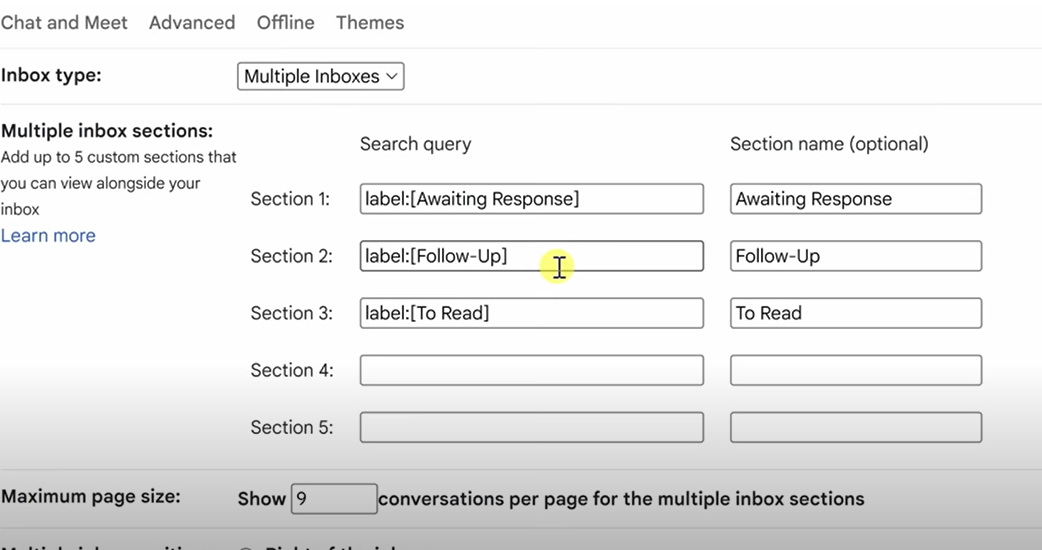
- Update “Multiple inbox position:” to “Right of the inbox”. This is our recommendation, but it is your preference.
- Click “Save Changes”
TRIAGE EMAIL
Now that we have setup the Multiple inboxes, you can see that Gmail has new sections on the right for you to use.
We can now triage all email into one of the categories or archive the email to get to “Inbox Zero”.
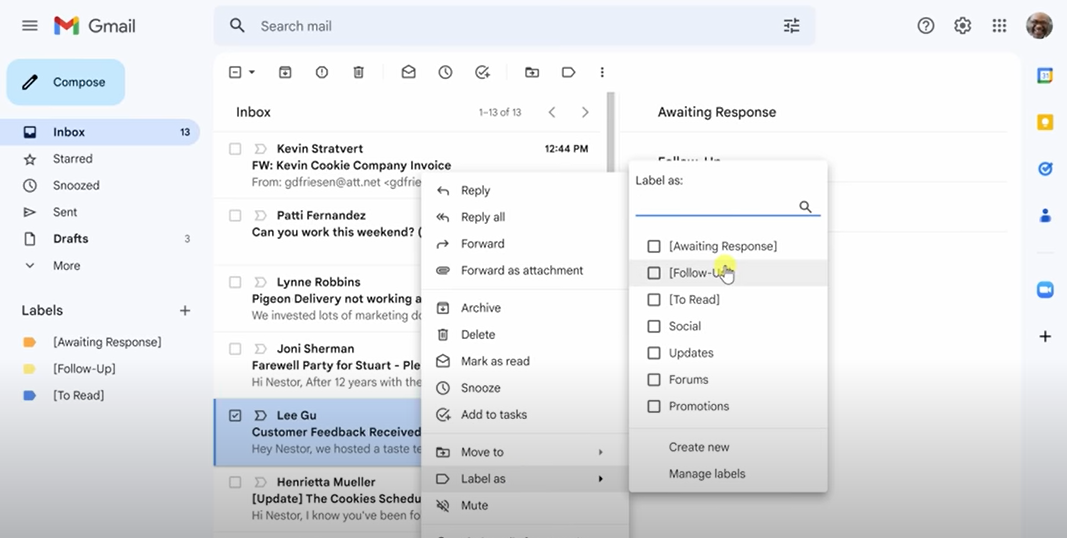
- Click an email and right click and select “Label as” and choose the appropriate label. Or select the Archive option to remove the email from the inbox.
- Go through each email message in your inbox and move it as appropriate into the right label or archive.
- You have now achieved Inbox Zero while still providing the appropriate actions for each email.
Some Tips and tricks:
- You can use the Star icon to easily prioritize emails over others in a section.
- You can expand and collapse sections by clicking the section name.
- You can see the entire list of emails in a section by selecting the “Show more messages” button available off the “1-5 of 5” button.

Hi Kevin,
FYI these links do not function.
Cheers,
Robin
LikeLike
Thanks for the note! All the links should now be working. Appreciate you calling this out!
LikeLike
This one I shall examine. It looks good. I’ll let you know what I think of it.
Cheers John
John Devenish 0434 389 068
LikeLike
Woops, Wrong recipient. Please disregard my previous email.
Cheers John
John Devenish 0434 389 068 Sent from my Nokia Android mobile
LikeLike