MERGE TOOLS ADD-IN
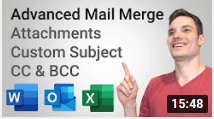
Mail Merge allows you to send customized envelopes, letters, and emails. Mail Merge leverages Microsoft Word, Excel, and Outlook.
In this tutorial, learn how to mail merge WITH attachments, customize the subject, and cc or bcc others using Office 365 with the Merge Tools Add-In. Additionally, learn how to set up the default email account that you send out a mail merge with.
INSTALL MERGE TOOLS ADD-IN
- Visit Merge Tools Add-in.
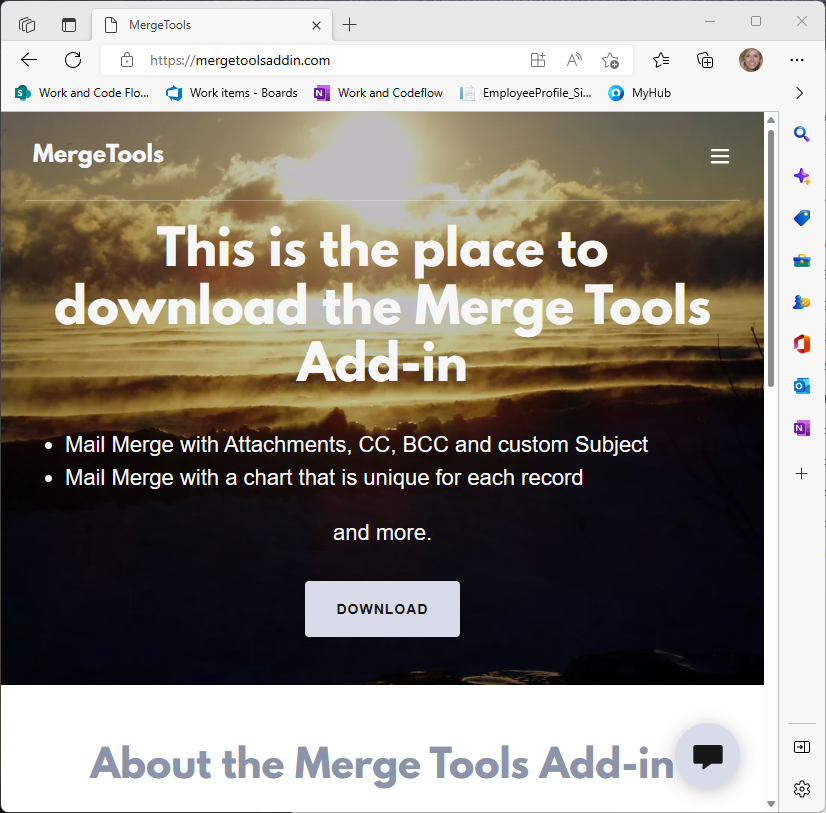
- Click the Download button to redirect you to the Download page.

- Click Download button. This will download the .zip folder containing the add-in along with supporting documentation.
- Open the folder where you saved the .zip folder. By default, it should be saved to your Downloads folder.

- Un-zip the zip folder by right clicking the MERGE TOOLS ADD-IN.zip file and selecting “Extract All…”

- Open the un-zipped folder to see the contents.

- Move the “Merge Tools – 2022” Microsoft Word Macro-Enabled Template to your Word Startup f0lder.
- You can find your Word Startup folder by the following steps:
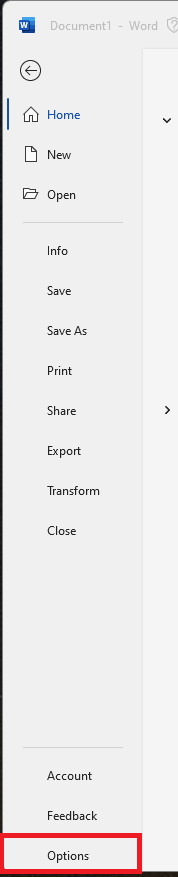
- Open Microsoft Word
- Click File -> Options.
- Select the Advanced Tab.
- Scroll down to the General section on the Advanced tab and select “File locations…” button
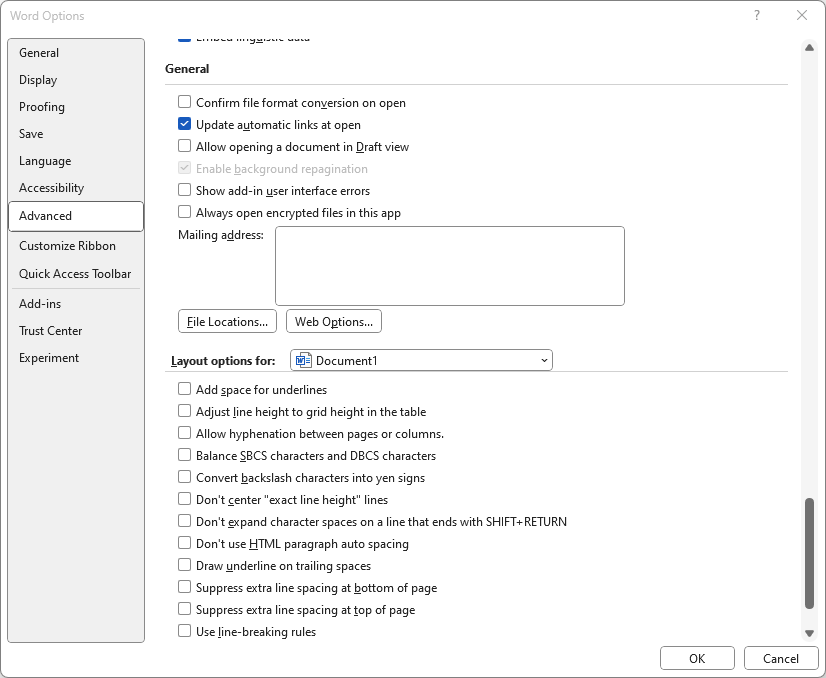
- At the bottom of the list is the Startup folder. You can click Modify to show the location.
- Copy the file location by selecting Ctrl-C in the explorer tab.
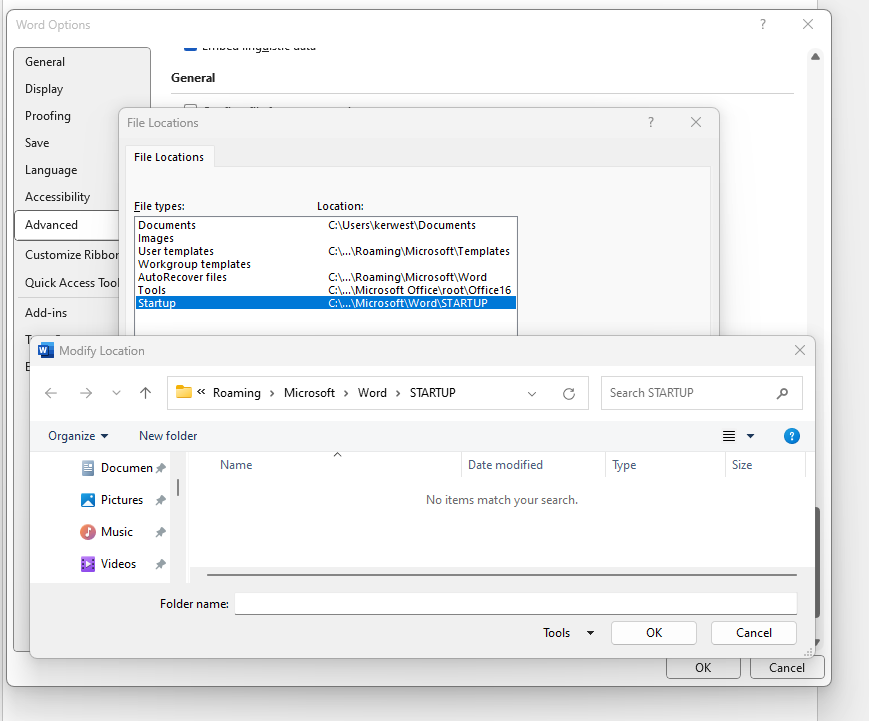
- Cancel out the dialogs.
- Open File explorer and navigate to the Startup folder by pasting in the location.
- Move the “Merge Tools – 2022” Microsoft Word Macro-Enabled Template to the Startup folder.

- You can find your Word Startup folder by the following steps:
- Close and re-open Microsoft Word. (This is necessary so it can enable the “Merge Tools – 2022”.
- You should be able to see the Merge Tools tab on the Word ribbon.
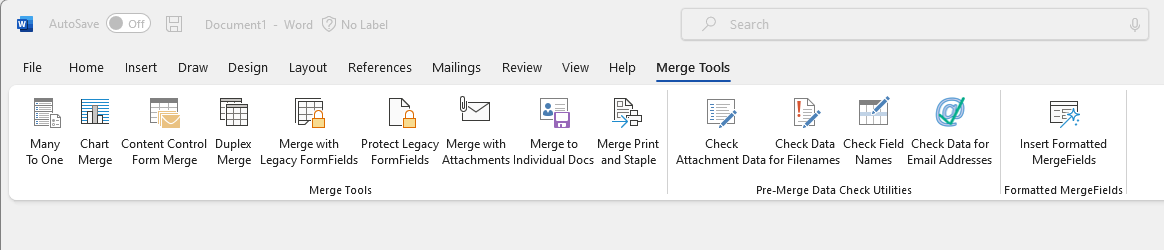
USING THE MERGE TOOLS ADD-IN
- Open Microsoft Word to a New Blank document.
- Create a Mail Merge by navigating to the Mailings tab on the ribbon.
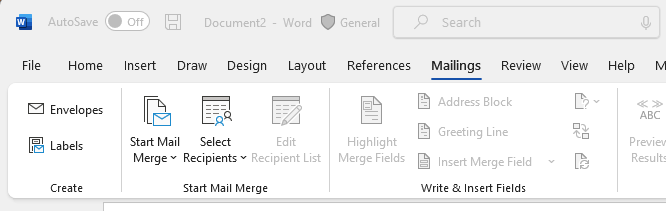
- On the ribbon, click on “Start Mail Merge” ->”Letters”.
(You can still send an email with this option but you will need to choose Letters as that is compatible with the Merge Tools Add-In)
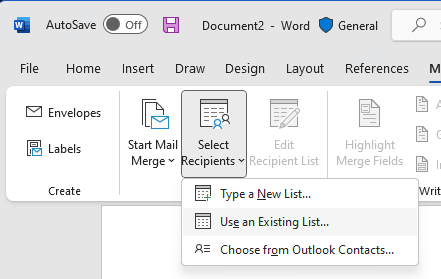
- On the ribbon, click on “Select Recipients” -> “Use an Existing List…”
- Select the Excel spreadsheet you want to use (in this example you can use this sampe spreadsheet) to perform your Mail Merge.
- The spreadsheet should include a column of at least emails and document locations on your computer, like this:
Email Address Document Locationkevstrat1@outlook.com C:\users\kevin\Desktop\document1.docxkevstrat2@outlook.com C:\users\kevin\Desktop\document2.docx
- The spreadsheet should include a column of at least emails and document locations on your computer, like this:
- Select the Sheet in the Spreadsheet to use (probably Sheet1) and click OK to close the dialog.
- Write the email you want to send in the Word document.
- You can add in the column names as Merge Fields to cusomize the email message using the “Insert Merge Field” option.
- Save the Word document.
- Click the Merge Tools ribbon tab.
- In the ribbon, click “Merge with Attachments” button to open the Mail Merge with Attachments dialog.

- Add the column that contains the attachment location to the right to ensure that each email gets the custom attachment.
- To have every email get the same attachment, add the document using the “Browse for attachments to be included with every message” and add the document that should be included for all emails.
- Choose the Merge Destination field and choose “Merge to Email Message”
- Select the Field containing the email to be the column name in the Excel spreadsheet with the email.
- If you want to set a CC or BCC Addresses you can do so in the next options.
- Select the “Data Source contains a subject field” and enter in the email subject.
- Click Continue
- Select All to email all users in teh Excel spreadsheet or choose
RESOURCES
- Merge Tools Add-in
- It is created by Doug Robbins and allows you to do a mail merge with attachments, custom subjects, and cc/bcc (it’s free to download; however, if you find value, consider donating)
- Need assistance with the Merge Tools add-in? Email Doug Robbins.
- My original mail merge video that works out of the box
- This does not show you how to include attachments, custom subjects, or cc / bcc others.
- How to find your Word start up folder
- Access the sample Excel spreadsheet that I used
- Don’t have Microsoft Office? Mail Merge for free using WPS Office.

Hi Kevin. thank you for this video and guide. I followed the installation and the process in mail merging however every time I click on the merge tools tab and click “merge with attachments” ribbon. It does not function. It does not open a screen. Am I doing something wrong? thanks and I appreciate your help.
LikeLike
hello im a big fan of you
LikeLike